Would you like creating a skin for JMediaPlayer? |
| Jenius 1.64: multimedia file organizer, with a media player and more. New version! Several improvements and fixes |
Software development |
This guide/features tour is based on CodecInstaller 2.7. It will be updated in future as new features of codecinstaller are introduced.
Tasks covered by this document:
Locate codecinstaller in the start menu and click on the program icon.
When CodecInstaller is launched, you'll see the main menu of the program:
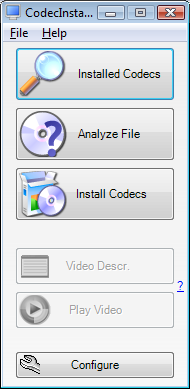
Here you can access the main sections of the program. The "Video Description" and "Play Video" buttons will probably be disabled: this is normal.
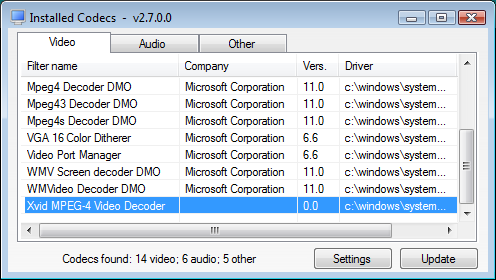
If you would like to see which audio and video decoders you have on your system,
click on "Installed Codecs":
you will get the list of codecs and filters installed. Here you can export
this list by clicking with the right mouse button and selecting "Copy to
clipboard"
or you can see more details about the codecs double clicking on them.
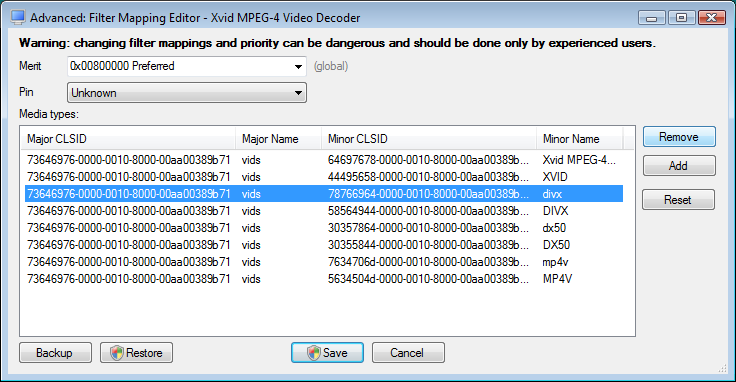
Let's say you have two filters that claim to be able to process a media type, but your system always chooses the one that works worse. You'll want to change this! (for a practical example: both the DivX and Xvid codecs may claim they can process a .avi file with a DIVX video stream, but the DivX codec will work better in this case: you'll want to have the DivX codec only process DIVX files, and the Xvid codec only process XVID files)
Select in the "Installed Codecs" list the filter that is chosen incorrectly, click on it with the right mouse button and hit "Filter Mapping Editor".
Select the media type that does not work well with that filter and click on "Remove", or set a lower "Merit" value.
Click on "Save" when you are done.
Please note that this is a task for advanced users who know what they are doing. It is strongly suggested to make a backup before applying any changes.
If you have a file that doesn't play correctly or if you want to get more info about it,
you can click on "Analyze File" from the main menu.
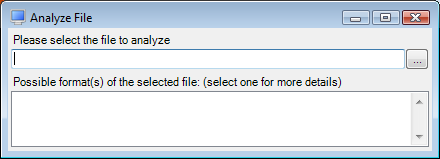
Enter in the text field on the top the path of the file, or select it by clicking
on the "..." button.
CodecInstaller will show you the possible formats of the file: this is very handy
to recognize fake files, as you can see in this screenshot
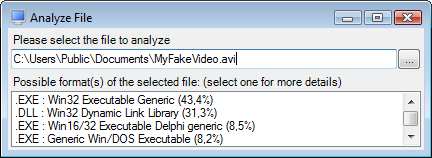
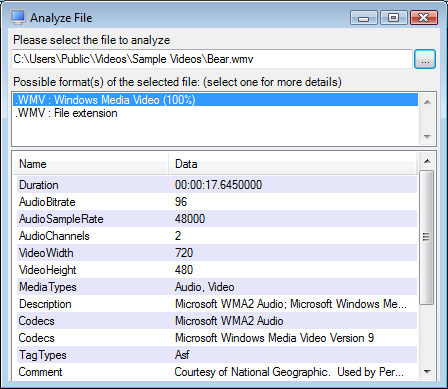
You can click on one of the possible formats to see if CodecInstaller can do
a deeper analysis:
CodecInstaller can analyze the most popular video and audio formats (avi,
mpeg, wmv, wma, ogg, flac, mpc, mp3, mp4, wav, wx) and will show you some technical
details such as duration, bitrate... and the available meta tags eventually
stored into the file (such as title, artist, lyrics..)
If you are analyzing an .avi file, you'll get a lot more detailed info about
it:
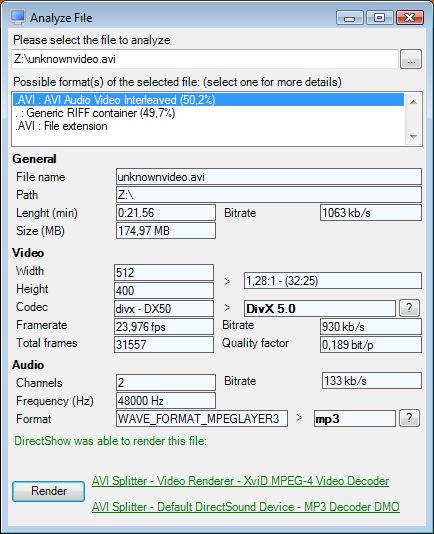
Clicking on the question mark buttons, the install codec window will be opened (see TASK: Install new codecs)
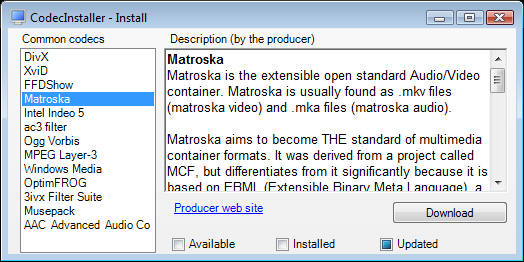
From here you can quickly check if you already have on your system the required
codec to perfectly play the video, and if you have the latest version. In case
you wish to install the codec, click on the "Download"/"Install" button.
- To install CodecInstaller, execute the file setup_CodecInstaller.exe or setup_CodecInstaller_full.exe you can
get from the downloads page. Administration permissions are required only if you want to install the program in the standard "Program Files" directory on Windows.
- To uninstall CodecInstaller, open the "Add or Remove Programs" utility located in
Windows' Control Panel. Find the entry called "CodecInstaller x.y.z" (where
x.y.z is the version number) and click on "Change/Remove". Click on "Yes" on
the next dialog. CodecInstaller will be completely removed from your system.
Please note that any change you made with CodecInstaller will be kept after uninstallation
(IE: changed filters priority or mapping, or new codec installed/uninstalled).